具体可见:官方教程
笔者发了邮件咨询,官方很快回复,给一个赞👍b( ̄▽ ̄)d
以下内容在官方教程的基础上给予翻译与少量修改
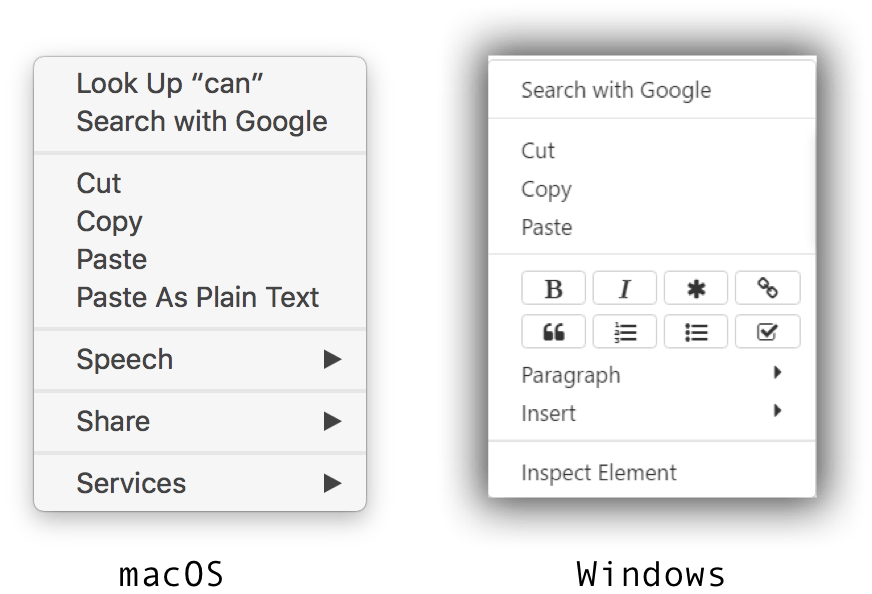
用户可以添加自定义搜索引擎,以扩展上下文菜单中显示的功能。
Users can add custom search engines to extend functions shown in context menu.

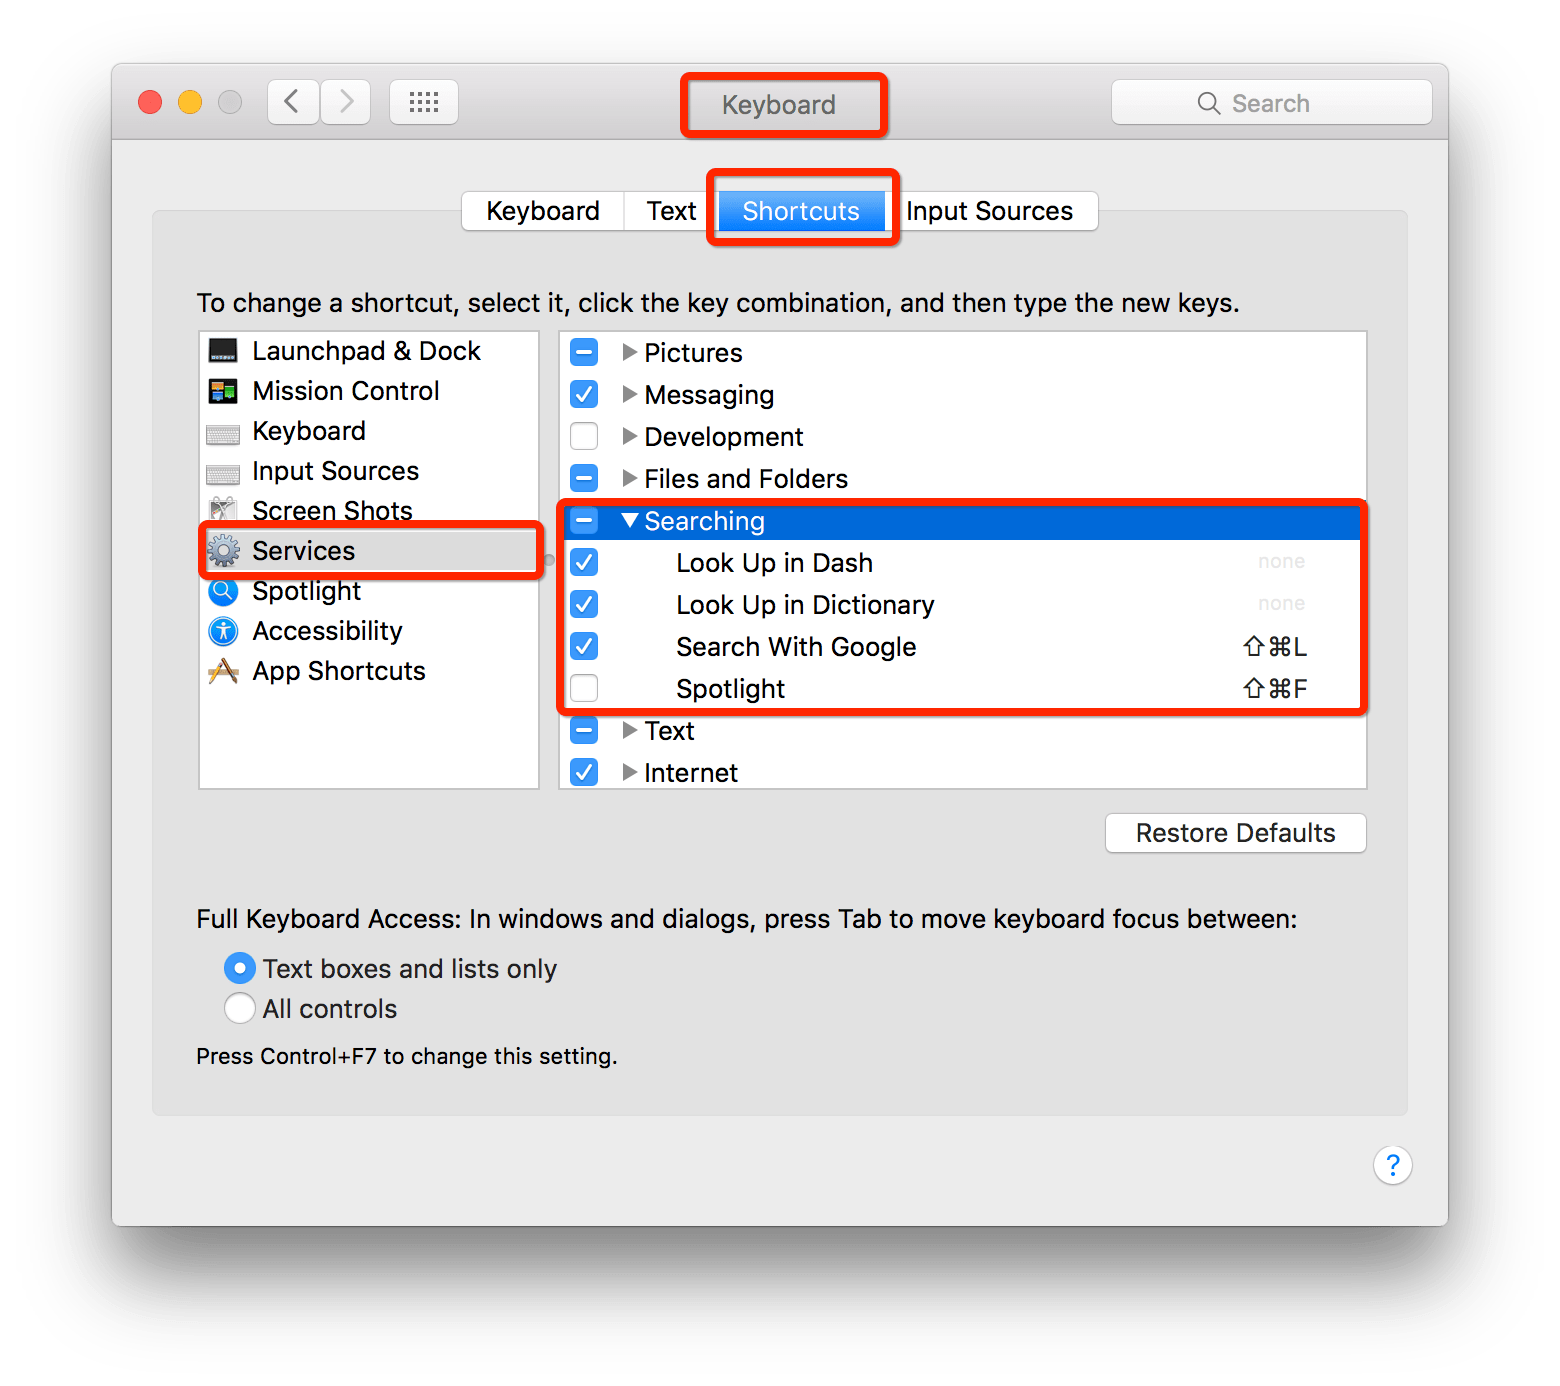
macOS(苹果桌面操作系统)
There is a system-wide preference to change available search engines in the context menu for most applications:
在大多数应用程序的右键菜单中,都有一个全局首选项来更改可用的搜索引擎:

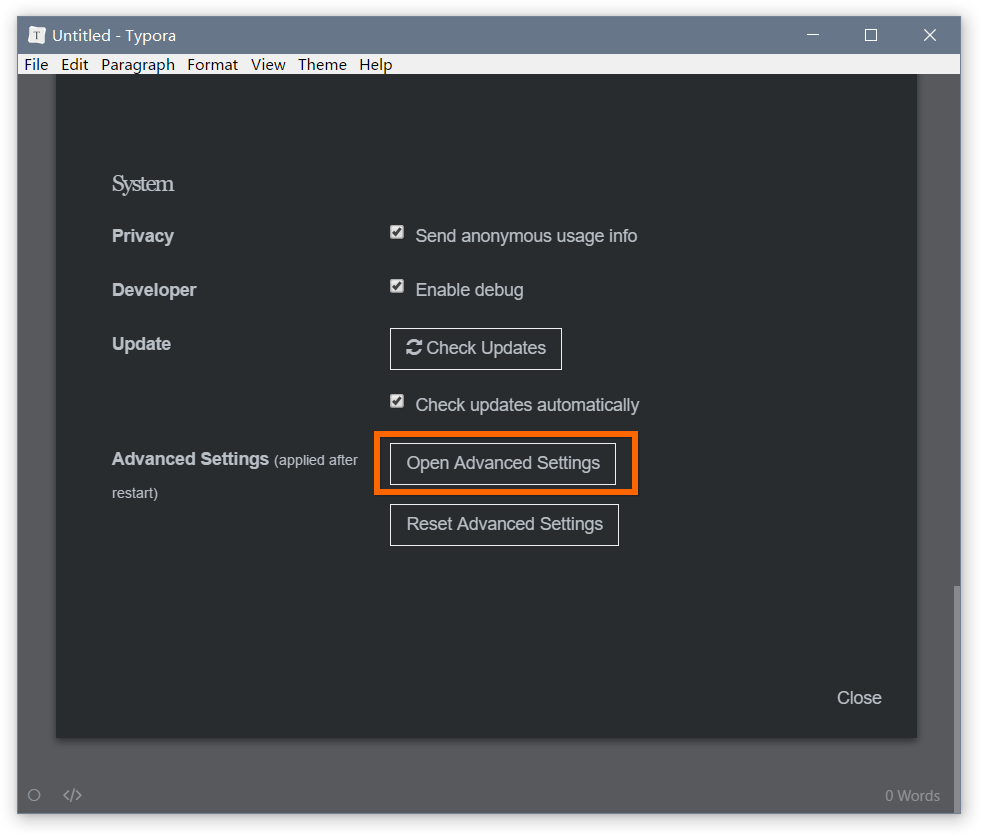
Windows / Linux
Open
Menu→Preferencein Typora, then click “Open Advanced Settings”. 在 Typora 中打开菜单→偏好设置,然后单击 “打开高级设置”。
Open and edit
conf.user.jsonfrom the “File Explorer”. If there’s no such file, create one. 从 “文件资源管理器 ”中打开并编辑conf.user.json。如果没有此类文件,请创建一个。
Modify or set following config into the
conf.user.jsonfile,%swill represent the selected text. for example: 在conf.user.json文件中修改或设置以下配置,%s代表所选文本(即你要检索的东西将会填入到此):"searchService": [ ["Search with Google", "https://google.com/search?q=%s"], ["Translate", "http://translate.google.com/?source=osdd#auto|auto|%s"] ["Search with Wikipedia", "https://en.wikipedia.org/wiki/Special:Search/%s"] ]Note: Default config is: 注:默认配置为
"searchService": [
    ["Search with Google", "https://google.com/search?q=%s"],
  ]
Restart Typora, and then the options from
searchServicewill be available from the context menu. 重新启动 Typora,然后就可以从右键菜单中使用searchService的选项了。

默认评论
Halo系统提供的评论